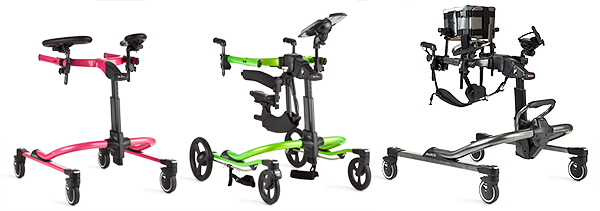
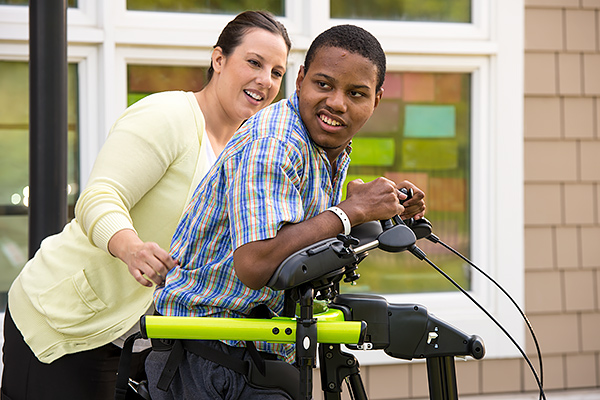
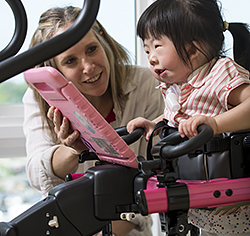
The Pacer gait trainer is a walking device used across pediatric settings and adult rehabilitation settings to support individuals with disabilities in upright postures and ambulatory activities. With the appropriate supports in the gait trainer, independent mobility becomes a possibility. Each Pacer accessory (or prompt) adjusts to accommodate any positioning need or is otherwise easily removed to accommodate improvements in a client’s motor skills.
Because many people use the Pacer without fully appreciating its full adjustability, this post describes the key components to upper body positioning and the features of the Pacer frame. Look to another post to focus on lower body positioning and the features of the Pacer casters.
The Rifton Pacer Frame
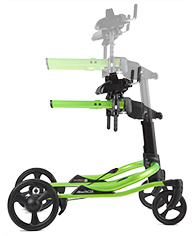 The Pacer gait trainer comes in five sizes, with the four largest sizes consisting of two parts: an upper frame (choose standard or dynamic) and a base (choose standard, utility or treadmill).
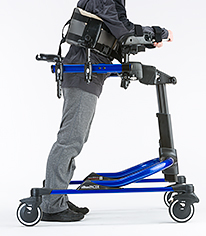
 The Pacer frames have a single telescoping front column with a gas spring (providing 30lb of lift-assistance) to allow for smooth height adjustment. Engage the height adjustment by pressing the white lever under the front column handhold. When placing a client in the Pacer, we recommend initially adjusting the top bar of the frame to the level of the client’s hip. The column is indexed for easy recording of position between clients and sessions.
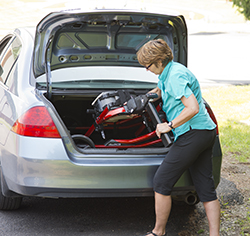
For compact storage or transfer, disengage the upper frame from the base, using the white button at the bottom of the column. (The mini Pacer frame is a one piece design, but still small enough to stow.)
Attaching the Prompts to the Pacer Gait Trainer
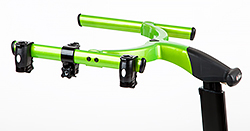 The basis of all prompt positioning is the modular clamp. The clamps attach anywhere along the top bar of the Pacer frame to position the various prompts in the best position for each client. Below are some guidelines for positioning the arm and trunk supports.
The Arm Prompts/ Arm Platforms/ Hand Loops of the Pacer Gait Trainer
When using the Pacer in the anterior position we recommend placing the arm prompt clamps on the top side bars and to the front of the crossbar attachment. The combination of clamp position, post direction and arm prompt adjustability allows for positioning the client’s arm at any angle and in any plane.
 With the arm prompts horizontal, placed with elbows below the shoulders, weight is shared through the shoulder girdle and arms, freeing the legs to move. Tilting the arm prompts down can encourage extended arm use prior to transitioning to walking with handholds. Additionally, attaching the arm prompts in an anterior/front placement creates the forward-leaning position that is most beneficial for clients initiating gait training.
 For diagrams showing the full range of adjustability, read our Arm Prompt Adjustability article.
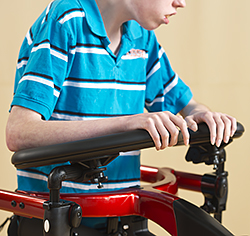
Arm platforms share the same attachment and adjustability of the arm supports, but provide fewer boundaries for children with good control of the upper extremities. Similarly, hand Loops work best for clients with less involvement needing only a hand hold.
The Pacer Gait Trainer Chest Prompt
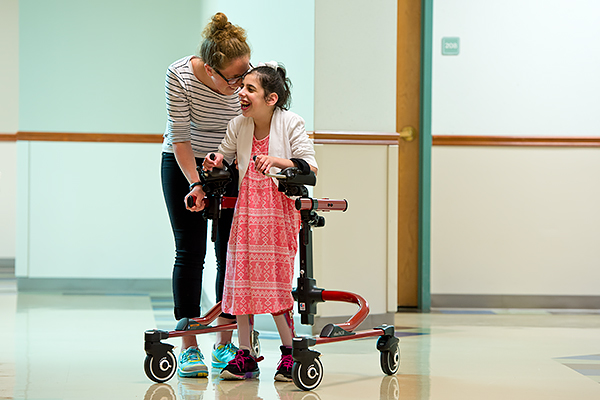
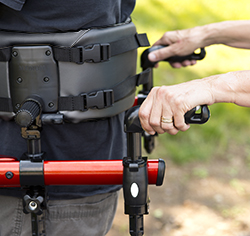 Place the chest prompt clamps on the top side bars and just behind the crossbar attachment when using the Pacer in the anterior position. When securing the chest prompt pad around the user, leave enough room under the armpits for comfort. (Adjust the height of the chest prompt in 1” increments using the white button on the clamps.) For some clients, the chest prompt is more effective when positioned lower, as a hip corral.
 Secure the chest prompt snugly for a dependent client, or fasten more loosely for someone who demonstrates improved trunk control. A loosely fitted chest prompt allows for increased trunk rotation and weight-shifting while still providing balance-control assistance.
Place the clamps for the chest prompt on either the inside or outside of the top bar, depending on the size of the individual. To gain additional width, loosen the chest prompt knobs and slide the attachments laterally. Use the same knobs to adjust the chest prompt tilt in 15° increments anteriorly if required.
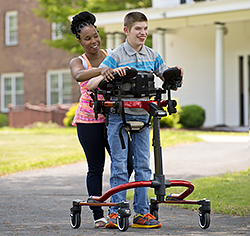 Clients who have difficulty initiating forward movement or those with spasticity or extensor tone often have more success when positioned in a forward-leaning posture. This keeps hips back and places the center of gravity forward to encourage forward momentum. The key to providing the appropriate amount of forward lean is the placement and angle of the hip positioner, chest prompt, and arm prompts: to increase forward-lean move the hip positioner back and the arm prompts forward, and tilt the chest prompt anteriorly.
With practice, many users will develop the skills they need to allow them to move to a more upright position. Positioning the arm prompts near the uprights with the chest prompt vertical encourages an upright standing position.

Alternatively, for clients requiring lower levels of trunk support the chest pad along with the simple handlebars provides adequate yet minimal positioning boundaries. Use the cam lever to adjust height and rotation of the pad and the knob of the clamp to adjust position of the chest pad along the top bar of the frame.
The Posterior Position in the Pacer Gait Trainer
Orient the Pacer in the posterior position for clients requiring minimal gait guidance with increased access to their environments. Place the arm prompts and other supports accordingly with the opening of the gait trainer as the front. Moving into the posterior position usually comes after prompt reduction – or the gradual decrease of supports from the gait trainer as the client becomes stronger and more independent through daily gait training practice.
Of course, the guidance in this post is just that – general guidance. In the end each person has special needs that require the direct personal involvement of a medical professional who should decide whether a device is appropriate.
Also see our post on lower body positioning in the Pacer gait trainer.
Back to Top** This post was originally published on http://www.rifton.com/adaptive-mobility-blog/blog-posts/2019/october/guidelines-functional-use-of-pacer-gait-trainer-1